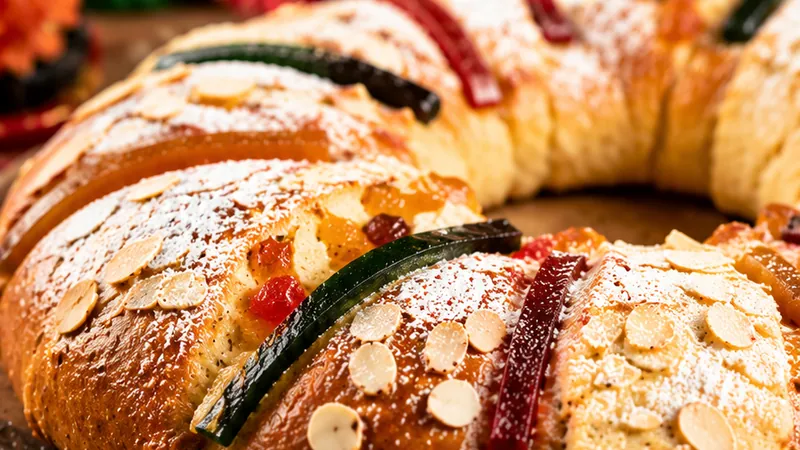
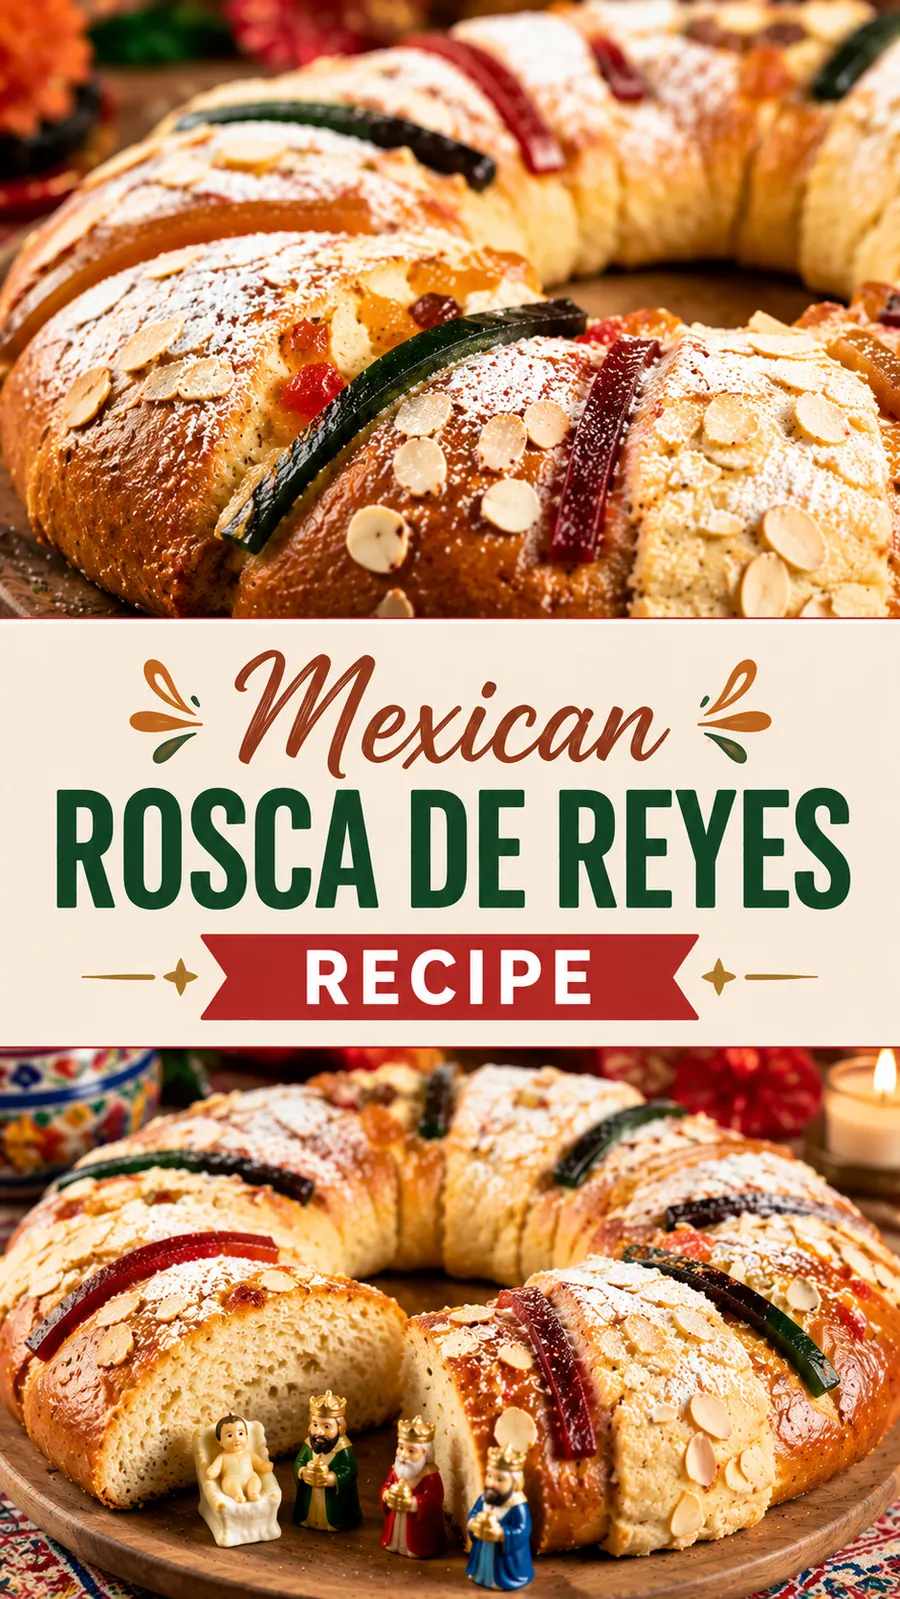
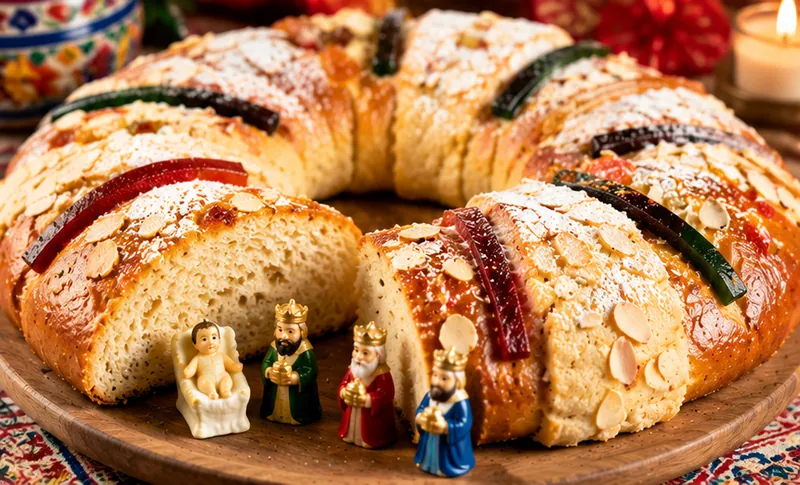
Few things in the world smell quite as inviting as a Rosca de Reyes baking in the oven. The sweet, eggy dough perfumed with orange zest, a whisper of anise, and warm vanilla fills the kitchen with something that feels celebratory before you have even pulled it from the oven. When it comes out golden and glossy, crowned with jewel-bright strips of candied fruit and sparkly sugar crystals, it looks like something that belongs at a royal feast. It is soft and pillowy on the inside, with a lightly sweet, brioche-like crumb that practically melts on your tongue.
Rosca de Reyes, which translates to King's Cake or Kings Ring, is the traditional bread of Three Kings Day, celebrated on January 6th across Mexico and much of Latin America. It is baked to honor the arrival of the Three Wise Men on the eve of Epiphany, and sharing it with family and friends is one of the most beloved food traditions of the holiday season. Inside each rosca, a tiny plastic baby figurine is hidden in the dough before baking. Whoever finds it in their slice is said to have good luck for the year and is traditionally responsible for hosting a tamale celebration in February on Candelaria Day. It is a recipe wrapped in story and meaning, which makes it taste even better.
 Save
I first tasted Rosca de Reyes at a neighbor's Three Kings Day party when I was in college, and I was completely unprepared for how good homemade bread could be. My neighbor's mother had been making it every year for as long as anyone could remember, and she pressed the recipe into my hands on a folded piece of paper before I left. It took me a few tries to get the dough right, but once I did, it became a January tradition in my own home. There is something deeply joyful about baking a bread that is meant to be shared, hunted through for a hidden surprise, and eaten together around a table full of people you love.
Mexican Rosca De Reyes Recipe
Ingredients
The Dough
Filling (Optional but Traditional)
Egg Wash
Decoration
Instructions
- Proof the Yeast
Warm the milk in a small saucepan or microwave until it reaches about 110 degrees Fahrenheit, which should feel comfortably warm but not hot on your wrist. Pour it into a small bowl and stir in 1 teaspoon of the granulated sugar and the active dry yeast. Let the mixture sit undisturbed for 8 to 10 minutes. When it is ready, the surface will look foamy and smell yeasty, which tells you the yeast is alive and active. If nothing happens after 10 minutes, the milk may have been too hot or the yeast may be old. Start over with fresh yeast before proceeding.
- Mix the Dry Ingredients
In the large bowl of a stand mixer fitted with the dough hook, combine the flour, remaining granulated sugar, salt, ground anise, orange zest, and lemon zest. Whisk them together briefly by hand to distribute everything evenly. The citrus zests will perfume the flour as they mix in, and you will smell the orange and lemon right away. This dry mixture is the base of your dough, and getting everything evenly distributed at this stage means you will not have to overwork the dough later to incorporate the flavors.
- Combine Wet Ingredients into Dough
Add the proofed yeast mixture, vanilla extract, and all four eggs to the flour mixture. Mix on low speed until a shaggy dough begins to form, about 2 minutes. Increase the speed to medium and knead for 4 minutes. The dough will look rough and sticky at this point, which is normal. Scrape down the sides of the bowl as needed. Do not add more flour yet, even if the dough looks wetter than you expect. The butter is added next, and it will transform the texture significantly.
- Incorporate the Butter
With the mixer running on medium-low speed, add the softened butter one or two pieces at a time, waiting until each addition is fully incorporated before adding the next. This process takes about 8 to 10 minutes in total and requires patience. The dough will go through an ugly, greasy-looking stage around the halfway point, but keep going. Once all the butter is worked in, increase the speed to medium-high and knead for another 5 minutes until the dough is smooth, slightly tacky, and pulls cleanly away from the sides of the bowl. If the dough seems overly stiff, add orange juice one tablespoon at a time to loosen it.
- First Rise
Shape the dough into a ball and transfer it to a lightly oiled large bowl. Turn it once to coat all sides in oil, then cover the bowl tightly with plastic wrap or a clean kitchen towel. Place it in a warm, draft-free spot in your kitchen and let it rise until it has doubled in size, which will take about 1 hour to 1 hour and 30 minutes depending on how warm your kitchen is. A good trick is to turn your oven to its lowest setting for 2 minutes, then turn it off and place the covered bowl inside. The residual warmth creates a perfect proofing environment.
- Prepare the Cream Cheese Filling
While the dough rises, beat the softened cream cheese, powdered sugar, and vanilla extract together in a small bowl until completely smooth and fluffy. Set it aside at room temperature so it stays spreadable. If you are making the plain version without filling, you can skip this step entirely. The filling adds a subtle creamy richness to each slice and a pleasant contrast to the sweet, fragrant dough, but the bread is wonderful either way.
- Shape the Rosca
Once the dough has doubled, gently punch it down to release the air and turn it out onto a lightly floured surface. If you are making a filled rosca, roll the dough into a large rectangle about 12 by 18 inches. Spread the cream cheese filling evenly over the surface, leaving a 1-inch border around the edges. Roll the dough tightly from the long side into a log, then bring the two ends together and pinch them firmly to form a sealed ring. If making a plain rosca, simply roll the dough into a long rope about 28 inches long and form it into a ring, pinching the ends together securely. Transfer the ring to a large parchment-lined baking sheet and gently stretch and reshape it into an even oval if needed.
- Second Rise
Cover the shaped rosca loosely with a clean kitchen towel or lightly oiled plastic wrap and let it rise in a warm place for 45 minutes to 1 hour, until it has puffed up noticeably and looks pillowy. It will not double in size the way it did during the first rise, but it should look significantly fuller and feel soft and airy when you gently press it with a fingertip. Meanwhile, preheat your oven to 350 degrees Fahrenheit and prepare your decorations so everything is ready when the bread goes in.
- Decorate Before Baking
Whisk together the egg and milk to make the egg wash and brush it gently but thoroughly over the entire surface of the risen rosca. Work carefully so you do not deflate the dough. Now arrange your candied fruit decorations on top in a pattern that follows the ring shape. Place alternating strips of candied orange peel, candied cherries, and candied figs at evenly spaced intervals around the top of the rosca. Traditional decoration uses the fruit to suggest crowns or royal adornment, so place the pieces thoughtfully. Once the fruit is in place, brush the exposed dough between the fruit pieces with the melted butter and sprinkle granulated sugar generously over the entire surface of the bread.
- Bake the Rosca
Bake the rosca in the preheated 350 degree oven for 28 to 32 minutes, until the top is a deep golden brown and the bread sounds hollow when you tap the bottom gently. Check the rosca at the 20-minute mark. If the top is browning too quickly, tent it loosely with a sheet of aluminum foil and continue baking. The internal temperature of the baked bread should reach about 190 degrees Fahrenheit if you want to be precise. Remove the rosca from the oven and let it cool on the baking sheet for 10 minutes.
- Hide the Baby Figurine
This is the step that makes a Rosca de Reyes truly a Rosca de Reyes. Once the bread has cooled for about 10 minutes and is still warm but handleable, use a thin skewer or small knife to poke a hole in the underside of the bread and tuck one or two plastic baby figurines inside, pushing them in far enough that they are fully hidden from view. Do not insert them before baking as the plastic can melt in the oven. Once the baby is hidden, let the bread cool for another 15 to 20 minutes before transferring it to a serving platter and slicing.
- Slice and Share
Transfer the cooled rosca to a large serving platter or wooden board. To serve, slice the bread at the table so everyone can gather around and discover who finds the hidden baby. Use a serrated bread knife and slice down through the bread cleanly, wiping the blade between cuts if needed. Each slice should show the soft, golden crumb inside. Serve the slices on small plates and watch the excitement as guests check their slice for the figurine. The person who finds it is crowned the lucky one of the year, and by tradition, they owe the table tamales on February 2nd.
Substitutions and variations
- If you cannot find candied citron or orange peel, thin strips of dried apricot or dried mango soaked briefly in warm orange juice make a beautiful and flavorful substitute.
- Orange extract can replace fresh orange zest if citrus is not available, using about 1 teaspoon in place of one orange worth of zest.
- Instant yeast can be used instead of active dry yeast. Use the same amount and skip the proofing step, adding it directly to the flour mixture.
- For a dairy-free version, substitute full-fat coconut milk for the whole milk and use vegan butter in equal amounts. The texture will be slightly different but still delicious.
- Anise extract can replace ground anise seed using about 1/2 teaspoon, or you can omit the anise entirely and add an additional teaspoon of vanilla for a milder, more universally appealing flavor.
- The cream cheese filling is optional. Many traditional recipes skip the filling entirely and let the enriched dough shine on its own, which is equally wonderful.
Chloe's tips
- Room temperature butter and eggs are non-negotiable for this dough. Cold butter will not incorporate smoothly and will leave the dough greasy and uneven. Take them out of the fridge at least an hour before you begin.
- Do not rush the butter incorporation step. Adding butter too quickly at once will break the dough structure. Go slow, add one piece at a time, and trust the process even when the dough looks strange in the middle of the step.
- If you do not have a stand mixer, you can make this dough by hand using the traditional slap-and-fold method. It will take about 15 to 20 minutes of energetic kneading, but it absolutely works and many bakers prefer it.
- Zest your citrus directly over the flour so the fragrant oils released during zesting fall into the bowl rather than evaporating into the air.
- The rosca can be shaped and left to do its second rise in the refrigerator overnight, covered tightly. Pull it out 30 minutes before baking to take the chill off, then decorate and bake as directed.
- If your candied fruit is very sticky and hard to work with, dust it lightly with a pinch of flour before pressing it onto the egg-washed dough to make placement cleaner and easier.
How to store it
- Store leftover rosca at room temperature, wrapped tightly in plastic wrap or kept in an airtight container, for up to 2 days. The bread is best on the day it is made but stays soft and pleasant through day two.
- For longer storage, wrap individual slices in plastic wrap and refrigerate for up to 4 days. The cold environment firms up the crumb, so let refrigerated slices come to room temperature or warm them briefly before eating.
- To reheat, place slices on a baking sheet in a 300 degree oven for 5 to 7 minutes, or microwave individual slices for 15 to 20 seconds wrapped in a slightly damp paper towel to restore softness.
- Rosca de Reyes freezes well. Wrap the fully cooled bread tightly in plastic wrap and then in aluminum foil, and freeze for up to 1 month. Thaw overnight at room temperature and warm gently in the oven before serving.
Serving suggestions
Rosca de Reyes is a celebration bread meant to be shared, and a few simple accompaniments make the experience feel truly festive.
- Serve slices alongside steaming mugs of Mexican hot chocolate for the most traditional and warming Three Kings Day combination
- A pot of atole, a warm corn-based drink flavored with vanilla or cinnamon, is the other classic pairing served alongside rosca throughout Mexico
- Spread a little softened butter or Mexican cream on each slice for extra richness, especially if you made the unfilled version
- Set the whole rosca in the center of the table and let guests slice their own piece as part of the festive tradition of discovering who hides the baby
- Leftover slices are wonderful toasted lightly and eaten the next morning with a cafe de olla or a strong cup of coffee
Frequently asked questions
When is Rosca de Reyes traditionally eaten?
Rosca de Reyes is eaten on January 6th, which is Three Kings Day or Epiphany. This date celebrates the arrival of the Three Wise Men to visit the baby Jesus, and sharing the rosca is a central part of the holiday across Mexico, Spain, and many Latin American countries. In Mexico, the tradition extends the holiday season past Christmas and New Year, making Three Kings Day a beloved celebration in its own right. Many families also eat rosca throughout early January, so you do not have to wait until the sixth to enjoy it.
What does finding the baby figurine mean?
Finding the tiny plastic baby hidden inside your slice of rosca is considered good luck and a great honor. According to tradition, the person who finds the baby represents the godparent of the Christ child and is obligated to host a celebration on February 2nd, known as Dia de la Candelaria or Candlemas. At that celebration, the lucky finder traditionally provides tamales and atole for everyone who shared the rosca. It is a tradition that keeps the community gathering and celebrating well into the new year.
Can I make the dough without a stand mixer?
Yes, absolutely. This dough can be made entirely by hand, though it requires more time and effort than using a mixer. After combining your wet and dry ingredients into a shaggy dough, use the slap-and-fold technique on a clean work surface, stretching the dough and folding it back on itself repeatedly. Once the dough becomes somewhat smooth, begin incorporating the softened butter in small pieces, kneading after each addition. The whole hand-kneading process will take about 15 to 20 minutes, but the results are just as good and many bakers find the hands-on process deeply satisfying.
Why does my dough look greasy during the butter addition?
This is completely normal and is one of the most common things that alarms first-time rosca bakers. When you add butter to an enriched dough, there is a stage mid-way through where the fat has not yet fully incorporated and the dough looks slippery, shiny, and falls apart easily. Do not panic and do not add flour. Keep the mixer going at medium speed and keep adding butter slowly. Within a few minutes the dough will come back together and become smooth, glossy, and elastic. Trust the process and stay patient.
Can I make the rosca a day ahead?
Yes, and it is one of the best make-ahead holiday breads there is. After shaping the rosca and placing it on the parchment-lined baking sheet, cover it tightly with plastic wrap and refrigerate it overnight for its second rise. The cold slows the yeast considerably, allowing a long, slow proof that actually develops more flavor in the dough. The next day, remove it from the refrigerator about 30 to 45 minutes before baking to take the chill off. Then decorate and bake as directed. The results are just as beautiful and often even more flavorful than baking it the same day.
Let's get cooking!
Baking a Rosca de Reyes is one of those kitchen experiences that goes beyond just making food. It is about carrying a tradition forward, filling your home with the scent of orange and vanilla and warm bread, and sitting around a table with the people you love most while everyone watches to see who finds the little baby tucked inside. Whether you are making this for the first time or the fiftieth, whether your kitchen is full of kids or just a couple of close friends, this bread brings joy in every step of the process. So clear your afternoon, put on some music, and let the magic of Three Kings Day come to life in your kitchen.